
Key Takeaways
- Amazon Sponsored Brands ads place your logo, headline, and products at premium positions in search results, helping brands increase visibility and customer acquisition.
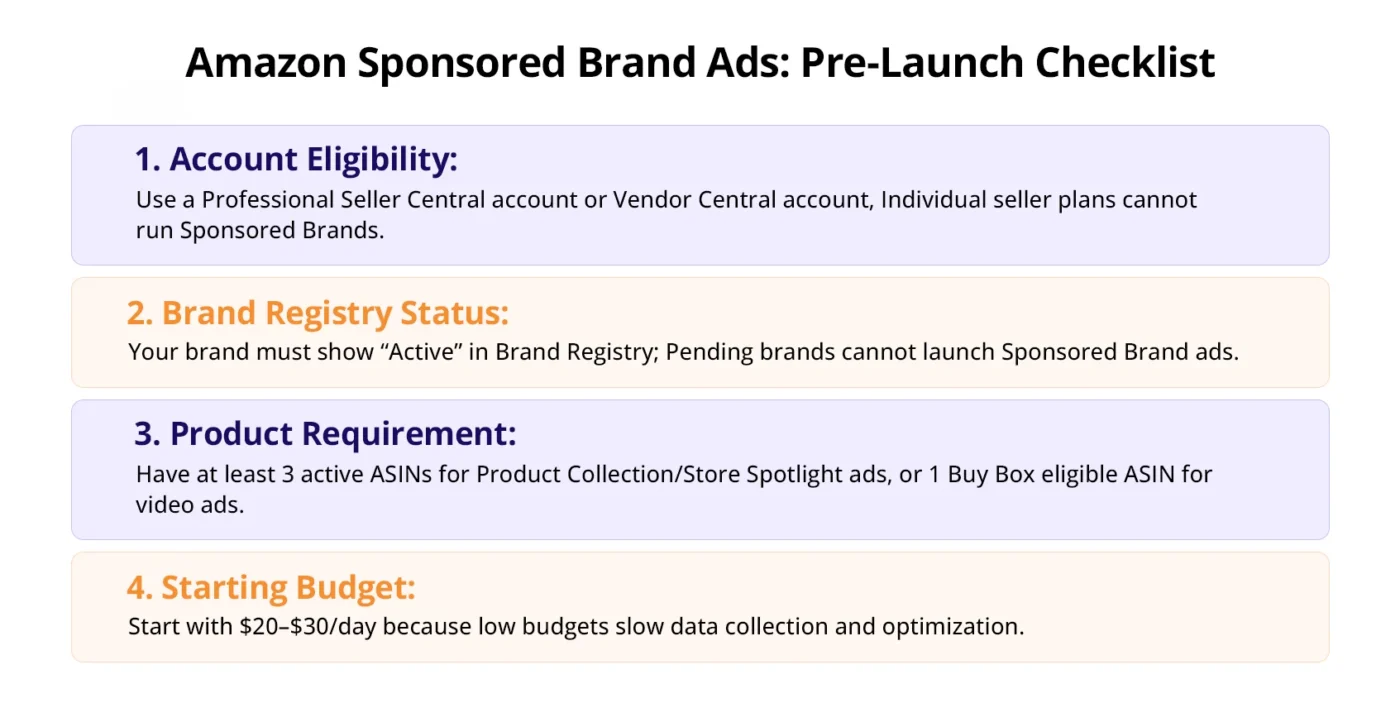
- To run Sponsored Brands on Amazon, sellers must have an active Professional account, enroll in Brand Registry, and maintain Buy Box-eligible ASINs.
- The three Sponsored Brands formats, Product Collection, Store Spotlight, and Sponsored Brand Video, each serve different goals and should be used strategically.
- Strong campaign performance comes from continuous optimization through search term analysis, creative testing, keyword refinement, and Amazon Store improvements.
- Linking ads to a well-structured Amazon Brand Store can increase New-to-Brand customer acquisition and create a stronger branded shopping experience.
If you’re already running Amazon Sponsored Product ads but haven’t touched Amazon Sponsored Brands ads yet, you’re leaving one of the most valuable placements on the table. Sponsored Brands sit at the very top of search results, above everything else, and they show your logo, a custom headline, and up to three products in a single ad unit. That kind of visibility doesn’t just drive clicks. It builds brand recall at scale.
This guide walks you through everything: account setup, ad specs, all three ad formats (including video), keyword and product targeting, campaign management, and scaling. Here, you will read the exact steps you need to run sponsored brand ads on Amazon the right way from day one.
What You Need to Run Amazon Sponsored Brand Ads
Before you touch the campaign builder, make sure you actually have access to sponsored brand ads on Amazon.
Account Type: Seller Central vs Vendor Central
Both qualify, but the path is slightly different.
- Amazon Seller Central (3P sellers): You need an active Professional selling account. Individual accounts cannot run Sponsored Brands.
- Amazon Vendor Central (1P vendors): You get access automatically, but your campaigns are managed through Amazon Advertising Console, not Seller Central.
Brand Registry: Verify You’re Enrolled
Sponsored Brands require Amazon Brand Registry enrollment. Here’s how to confirm your status:
- Go to brandregistry.amazon.com
- Sign in with your Seller or Vendor credentials
- Under Manage, check that your brand status shows “Active”
- If it says “Pending” or your brand isn’t listed, complete the trademark submission before proceeding
You cannot run Sponsored Brands without an active Brand Registry enrollment. There are no workarounds.
Minimum Products Requirement
You need at least 3 active, buyable ASINs to run a Product Collection or Store Spotlight ad. For video ads, you only need 1 ASIN, but that ASIN must be in stock and Buy Box eligible.
Realistic Budget to Start Running Amazon Sponsored Brand Ads
Amazon will suggest a minimum daily budget of around $1. Ignore that. In practice, you need a minimum of $20–$30/day to generate enough impressions and data to make optimization decisions within the first two weeks. Starting with $5/day will give you data so slow it’s nearly useless.
How to Set Up Your First Sponsored Brand Ad on Amazon: Step by Step

Here’s exactly how to get your first Amazon Sponsored Brands ad live.
Step 1: Navigate to the Campaign Builder
- Log into advertising.amazon.com
- Select your brand profile from the top navigation
- Click “Create campaign” in the left sidebar
- Select “Sponsored Brands” from the campaign type options
You’ll land on the campaign settings page.
Step 2: Choose Your Campaign Goal
Amazon will ask you to select a goal:
- Page visits: Optimizes for clicks to your Store or landing page. Use this when launching a new product or building brand awareness.
- Conversions: Optimizes for purchases. Use this once you have sales history and conversion data on the ASINs in the ad.
If this is your first campaign, start with Page visits. You need traffic data before Amazon’s algorithm can optimize for conversions effectively.
Step 3: Set Your Daily Budget and Campaign Dates
- Set a daily budget of at least $20 to start
- Leave the end date blank. Open-ended campaigns don’t get throttled the way dated campaigns sometimes do, as they approach the end date
- Amazon spends your daily budget more evenly throughout the day when there’s no end date pressure
Step 4: Name Your Campaign
Use a naming convention you won’t regret at scale. Here’s one that works:
[Brand] | SB | [Ad Format] | [Targeting Type] | [Match Type] | [Date]
Example: NovaBrew | SB | ProductCollection | Keyword | Exact | 2025-01
This lets you filter campaigns instantly in the console without opening each one.
Step 5: Choose Your Targeting Type
You have two options:
- Keyword targeting: Your ads show when shoppers search specific terms. Best for broad reach and top-of-funnel visibility.
- Product targeting: Your ads appear on specific product detail pages or categories. Best for conquering competitors or defending your own category.
Most brands should start with keyword targeting. Add product targeting in a separate campaign once you know which keywords convert.
Amazon Sponsored Brand Ad Specs Requirements
Getting your creative assets right before you start building the ad saves you from rejections that can delay your launch by 24–72 hours. Here are the exact Amazon sponsored brand ad specs for every format.
Headline
- Character limit: 50 characters (including spaces)
- No promotional language like “Best Price,” “On Sale,” or “#1” unless you can substantiate the claim with a third-party source
- No competitor brand names
- Must be in sentence case (First word capitalized, rest lowercase)
Logo
| Spec | Requirement |
| Dimensions | 400 x 400 px minimum |
| Aspect ratio | 1:1 (square) |
| File format | PNG or JPEG |
| Max file size | 1 MB |
| Background | Solid background preferred; transparent PNG accepted |
Your logo must not contain pricing, promotional text, or contact information.
Custom Image (Product Collection format)
| Spec | Requirement |
| Dimensions | 1200 x 628 px |
| Aspect ratio | 1.91:1 |
| File format | PNG or JPEG |
| Max file size | 5 MB |
| Safe zone | Keep all key visuals within the center 80%, edges may be cropped on mobile |
Most Common Rejection Reasons and How to Fix Them
| Rejection Reason | Fix |
| Headline uses superlatives (“Best,” “#1”) | Rewrite using a benefit-led statement instead |
| Logo has promotional text | Submit a clean brand logo without any taglines |
| Custom image has text overlaid on the product | Move text to a background area, keep product clean |
| Image resolution too low | Export at 72 DPI minimum, ideally 150 DPI |
| Lifestyle image contains a competitor product | Reshoot or crop the image to remove it |
Always check your rejection reason in the Campaign Manager > Ad > Moderation status column. Amazon gives you a specific reason, read it carefully before resubmitting.
How to Build the 3 Ad Formats: One by One
Amazon gives you three Sponsored Brands formats. Each one serves a different purpose. Here’s how to build each one correctly.
1. Product Collection Ad: Step-by-Step
Product Collection is the default format and the right starting point for most brands. It shows your logo, headline, and 3 products in a banner at the top of search results.
Step 1: Select your products
- Click “Add products” in the ad builder
- Search by ASIN or keyword
- Select at least 3 products (you can add up to 100 in the backend, though only 3 display at a time)
- Prioritize products with strong reviews (4+ stars, 50+ reviews) and Buy Box ownership
Pro tip: Don’t add out-of-stock ASINs. Amazon will rotate them out automatically, but it wastes impressions in the meantime.
Step 2: Write your headline
Your headline is the single most important copy element in a Sponsored Brands ad. Use this formula:
[Brand name] + [Core benefit or use case] + [Optional urgency or differentiator]
Examples:
- “NovaBrew: Specialty Coffee Brewed Fresh at Home”
- “VivaFit: Resistance Bands for Every Training Level”
- “LunaCase: Drop-Tested iPhone Protection”
Avoid generic headlines like “Shop Our Latest Collection.” They get clicks out of curiosity but convert poorly.
Step 3: Choose your landing page
You have three options:
- Amazon Store: Best for brand awareness campaigns and shoppers new to your brand. Higher NTB (New-to-Brand) rate.
- Custom URL: Use a specific Store subpage (e.g., a seasonal collection). Good for promotions.
- Product list page: Amazon auto-generates a page with your selected ASINs. Fastest to set up but lowest brand impact.
Start with your Amazon Store homepage or a relevant Store subpage. The branded experience converts better than the generic product list page in most categories.
2. Store Spotlight Ad: Step-by-Step Build
Store Spotlight replaces individual product images with three Store subpage tiles. It’s designed for brands with a well-built Store and multiple product categories.
When to use Store Spotlight instead of Product Collection:
- You have 3+ distinct product categories in your Store
- You’re running a category-level awareness campaign (not pushing a single product)
- Your Store has high-quality custom images per subpage
Step 1: Confirm your Store has at least 3 subpages
Go to Stores > Manage Store and verify. Each subpage must be published and have at least one product. If you have fewer than 3 subpages, use Product Collection instead.
Step 2: Build the ad
- In the ad builder, select “Store Spotlight” as the ad format
- Choose your Store from the dropdown
- Select which 3 subpages to feature, pick the ones with your strongest product imagery
- Write your headline using the same formula from Section 4a
- Upload your logo to Amazon sponsored brand ad specs (400 x 400 px, PNG/JPEG, 1 MB max)
Step 3: Review the mobile preview
Store Spotlight ads look different on mobile vs desktop. Always toggle to the mobile preview in the builder before submitting. Subpage tile images crop differently on smaller screens.
3. Amazon Sponsored Brand Video Ads: Step-by-Step Setup
Amazon sponsored brand video ads are a separate placement from standard Sponsored Brands. They appear mid-page in search results as an autoplay, muted video unit. They’re one of the highest-CTR formats on the platform when done right, and one of the most misused.
Where Video Ads Appear
- Mid-search results page (below the fold, between organic listings)
- Videos autoplay muted with no sound until the shopper taps/clicks
- Clicking the ad goes directly to the product detail page (not a Store)
Complete Video Spec Requirements
| Spec | Requirement |
| Aspect ratio | 16:9 |
| Resolution | 1280 x 720 px minimum; 1920 x 1080 px recommended |
| File format | MP4 or MOV |
| File size | Maximum 500 MB |
| Duration | 6 seconds minimum, 45 seconds maximum |
| Frame rate | 23.976, 24, 25, 29.97, or 29.98 fps |
| Bitrate | 1 Mbps minimum |
| Audio format | AAC or MP3 |
| Audio sample rate | 44.1 kHz |
| Subtitles/captions | Strongly recommended (most views are muted) |
How to Upload Your Video
- In the campaign builder, select “Video” as your ad format
- Click “Upload video”
- Select your file (MP4 or MOV)
- Amazon will run an automatic compliance check, which takes 1–5 minutes
- If it passes, your video moves to “In Review”, human moderation typically takes 24–72 hours
- Select the ASIN that this video will point to
- Your headline and logo are auto-populated from the ASIN’s listing, you cannot add a custom headline for video ads
Audio Requirements You Cannot Skip
Amazon requires that:
- Background music is licensed or royalty-free
- No audio contains competitor brand names
- No audio makes unsubstantiated claims (e.g., “clinically proven”)
- Volume levels must be consistent, no jarring audio spikes
If you’re submitting a video with a voiceover, ensure the voiceover doesn’t make claims that aren’t backed by your product detail page.
Common Video Rejection Reasons
| Rejection Reason | Fix |
| Video contains competitor brand names or logos | Remove or blur all competitor references |
| Unsubstantiated claims in audio or on-screen text | Remove or add qualifying language (“as tested by…”) |
| Low resolution | Re-export at 1920 x 1080 minimum |
| File too large | Compress using HandBrake (free tool) while maintaining quality |
| Music not licensed | Replace with royalty-free music from Epidemic Sound, Artlist, or Musicbed |
| Text too small to read on mobile | Increase font size, test at 375px viewport width |
What to Show in the First 3 Seconds
Since the video autoplays are muted, your first 3 seconds are your entire hook. The best-performing structure is:
- Second 0–1: Product front and center, high contrast background
- Second 1–2: Single bold text overlay showing the #1 problem your product solves
- Second 2–3: Product in use (in context)
Don’t open with a logo animation. Don’t open with a slow fade-in. Put the product on screen immediately with a visual that makes the shopper stop scrolling.
How to do Keyword Targeting for Sponsored Brand Ads
Targeting the wrong keywords is the fastest way to burn your budget with nothing to show for it. Here’s how to build a keyword list that actually converts.
How to Build Your Keyword List
Pull keywords from these four sources in order:
- Amazon’s suggested keywords in the campaign builder accept the high-relevance ones, skip anything with weak search volume
- Your Sponsored Products Search Term Report, filter for terms that converted in the last 60 days, then add them to Sponsored Brands
- Competitor ASINs, run a reverse ASIN lookup using Helium 10 or DataDive to see what keywords your top competitors rank for organically
- Amazon Auto Campaign data, if you’ve run an auto Sponsored Products campaign, mine its search term report for exact match opportunities
Match Type Strategy
Don’t mix match types in the same campaign. Run separate campaigns for each:
| Match Type | Starting Bid | Purpose |
| Exact | $1.50–$2.50 | Proven, high-intent terms where you know conversion intent |
| Phrase | $1.00–$1.75 | Catching variations of your core terms |
| Broad | $0.50–$1.00 | Discovery, finding new terms you haven’t thought of |
Start with an exact match using your 10–15 highest-confidence keywords. Add Phrase and Broad in separate campaigns once your Exact campaign has data.
Negative Keywords: When and What to Add
Don’t wait until Week 4 to add negative keywords. Add these before launch:
- Your own brand name (if you have a separate brand campaign)
- Unrelated categories that share a word with your product
- Terms with “free,” “DIY,” “how to make, ” attract research traffic, not buyers
- Competitor brand names (unless you’re running a conquesting campaign intentionally)
Negative keyword type: Use Negative Exact for specific terms. Use Negative Phrase only for high-confidence broad exclusions.
Starting Bids by Match Type
These are real starting points, not Amazon’s suggested bids, which are almost always inflated:
- Exact match: Start at $1.50. Increase by $0.25 every 7 days if the impression share is below 40%.
- Phrase match: Start at $1.00. Let it run 14 days before adjusting.
- Broad match: Start at $0.50. This is a discovery campaign, keep bids low and harvest term data.
How to do Product Targeting with Sponsored Brand Ads
Product targeting lets your Amazon Sponsored Brands ads appear on competitor product pages and category browse pages, not just in search results. It’s one of the most underused targeting strategies on the platform.

How to Target Competitor ASINs
- In the campaign builder, select “Product targeting” as your targeting type
- Choose “Individual products”
- Enter the ASINs of your top 5–10 competitors manually, or use the “Suggested products” list Amazon provides
- Set your bid at $0.75–$1.25 per ASIN to start
The goal is to appear on their product page and intercept shoppers who are comparison shopping. Your ad will show at the top of their detail page on mobile, or in the sidebar on desktop.
Who to target: Focus on competitors with lower review counts, higher prices, or weaker main images than yours. You want shoppers to see your ad and feel like you’re the better option.
How to Target by Category
Category targeting is broader and cheaper per click:
- Select “Categories” in the product targeting section
- Browse or search for your product category
- Optionally refine by: price range, review star rating, Prime eligibility, or brand
Use category targeting when you want shelf presence in your space without going ASIN by ASIN. This is also useful for defending your category against newer entrants.
Bid Differences: ASIN vs Category Targeting
- ASIN-level bids: Higher ($0.75–$1.50). More competitive, more precise, higher intent.
- Category-level bids: Lower ($0.40–$0.80). Broader audience, more impressions, lower intent.
Run them in separate ad groups so you can control bids and budgets independently.
How to Connect Your Brand Store to Sponsored Brand Ads
Linking your ad to your Amazon Store instead of a product page changes the entire customer experience, and almost always improves your New-to-Brand (NTB) metric.
Why Your Store Landing Page Matters More Than You Think
When a shopper clicks a Sponsored Brands ad that leads to a product page, they see one product. When they land on your Store, they see your entire brand. Studies from Amazon’s own advertising data consistently show that Store-linked Sponsored Brands campaigns drive a higher NTB customer rate than product page-linked campaigns.
Higher NTB = you’re acquiring new customers, not just re-converting existing ones. For brand building, that’s the metric that matters.
Step-by-Step: Link a Store Subpage to Your Ad
- In the ad builder, under “Landing page,” select “Store and subpage”
- Click the dropdown, and your published Store pages will appear
- Select the subpage most relevant to the products in your ad
- Running a coffee grinder ad? Link to your “Grinders” subpage, not your homepage
- Running a seasonal campaign? Create a seasonal subpage in your Store first, then link to it
- Preview the Store page in the builder to confirm it loads correctly
- Save and continue
How to Set Up a Store Subpage That Converts
A Store subpage that kills conversion has these problems: too many products, no clear hierarchy, and no content beyond a product grid. Here’s what a converting subpage looks like:
- Hero banner: One strong lifestyle image at the top, 1–2 lines of copy maximum
- Featured product row: Your 2–3 best sellers front and center
- Supporting content: A short benefit-focused text tile or comparison chart
- Full product grid: Remaining ASINs below the fold
Keep the subpage clean. Shoppers arriving from an ad are in buy mode. Don’t distract them.
How to Scale Sponsored Brand Ads
Once your campaign is profitable, here’s how to scale without destroying your ACOS.
Use the Search Term Report to Find New Keywords
Every two weeks, run the Search Term Report and look for terms that:
- Generated 2+ purchases
- Have an ACOS below your target
- Are not already in your Exact match campaign
Move them into a new Exact match campaign immediately. Don’t leave profitable terms buried in a Broad or Phrase campaign where you can’t control the bid precisely.
Structure Campaigns as You Scale
Once you’re managing more than 3 ad groups, restructure into this architecture:
Portfolio: [Brand Name] — Sponsored Brands
├── SB | ProductCollection | Keyword | Exact | [Top Keywords]
├── SB | ProductCollection | Keyword | Phrase | [Category Terms]
├── SB | ProductCollection | Keyword | Broad | [Discovery]
├── SB | Video | Keyword | Exact | [Top Converting Terms]
└── SB | ProductCollection | ProductTargeting | [Competitor ASINs]
Keeping these as separate campaigns (not ad groups within one campaign) gives you independent budget control. If your video campaign is outperforming, you can increase its budget without pulling from your keyword campaigns.
Portfolio-Level Budget Caps
Portfolios let you set a total budget cap across multiple campaigns. Use this to:
- Cap total daily spend across your Sponsored Brands portfolio without manually adjusting each campaign
- Set a monthly budget cap for your entire brand advertising
To set it up:
- Go to Portfolios in the left nav of the Amazon Ads console
- Create a portfolio for your brand
- Assign all your Sponsored Brands campaigns to it
- Set a monthly budget cap, not a daily one (daily caps can cause campaigns to go dark mid-month)
A/B Testing Headlines and Creatives
Amazon has a built-in creative testing tool for Sponsored Brands:
- Open an existing Sponsored Brands campaign
- Click into the ad
- Select “Create A/B test” (this option appears in the ad detail view)
- Set: test duration (14 days minimum), metric to optimize (clicks or conversions)
- Create your alternate headline or creative
- Submit both versions, Amazon splits traffic 50/50 automatically
Test one variable at a time. If you change the headline and the image simultaneously, you won’t know which one drove the result.
Conclusion
Amazon Sponsored Brands ads can become a powerful driver of visibility and customer acquisition, but long-term success comes from ongoing optimization rather than simply launching campaigns and leaving them untouched. The brands seeing the strongest results consistently analyze search term data, refine their messaging, test creative variations, and turn their Amazon Store into a high-converting destination rather than a basic storefront.
Building profitable Sponsored Brands campaigns is a process: start with the fundamentals, validate what works, and expand strategically over time. Small improvements across campaign structure, targeting, creative, and placement optimization create a compounding advantage that many competitors fail to build.
If you’re struggling with Sponsored Brands performance, Store optimization, or creating a scalable Amazon advertising strategy, AMZDUDES, a full service Amazon agency, can help manage and optimize your campaigns from planning through execution. Ready to turn Sponsored Brands into a long-term growth channel for your business? Book a free consultation call with AMZDUDES today.
Frequently Asked Questions
1. Do you need Brand Registry for Sponsored Brands on Amazon?
Yes. Brand Registry enrollment is a hard requirement for all Sponsored Brands formats.
2. What is the minimum budget for Amazon Sponsored Brand ads?
Amazon’s technical minimum is $1/day, but realistically you need $20–$30/day to generate actionable data within the first two weeks.
3. Where do Amazon Sponsored Brand video ads appear?
They appear mid-page in search results as autoplay, muted video units. They link directly to the product detail page, not a Store.
4. Can you run Sponsored Brands without an Amazon Store?
Yes, you can link to a product list page. But Store-linked campaigns consistently drive higher New-to-Brand rates and are strongly recommended for brand awareness objectives.
5. How long does Sponsored Brands ad approval take?
Standard creative review takes 24–72 hours. Video ads can take up to 72 hours or slightly longer.